Category Archives: Franco_Prussian War

Gettysbourgade 1870, a BBB! FPW AAR

I called a halt to my FPW campaign. The campaign rules I was using allowed for a much more rapid French mobilization than what actually occurred, faster than the Prussians even, and it was obvious that the French would end up victorious. While I figure out what I’ll do for the next attempt at a full campaign I took advantage of a visit from my brother to do a one-off battle using Bloody Big Battles. I’m not a great scenario designer so I turned to history, yet again, and decided to do a version of Gettysburg but set in 1870. The Prussians took the role of the Confederates while the French acted as the Union.

The Prussian army consisted of 3 Prussian corps, 2 Bavarian corps, and a division from Wurttemberg. Altogether 11 divisions. The French had the I, V & VII corps along with the Imperial Guard. This added up to 12 divisions on the table. The Prussian divisions were a bit larger, averaging around 10K infantry while the French were more in the 8K range. The Prussians also had significantly more artillery, roughly 40 guns per division compared to the French at 24.


DSC_0005

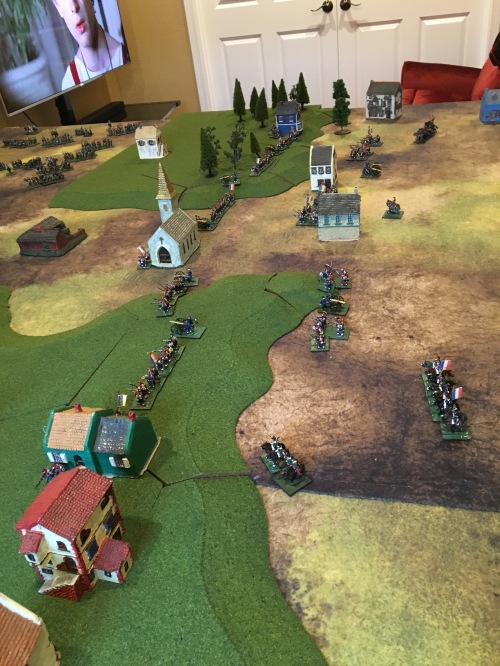
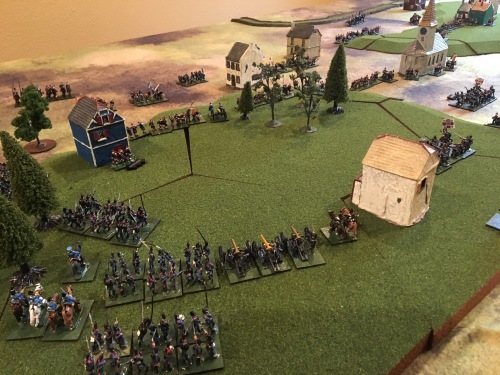
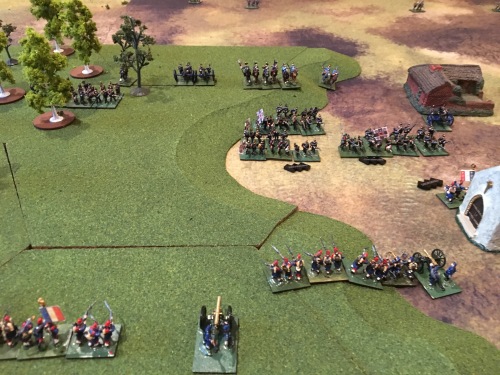
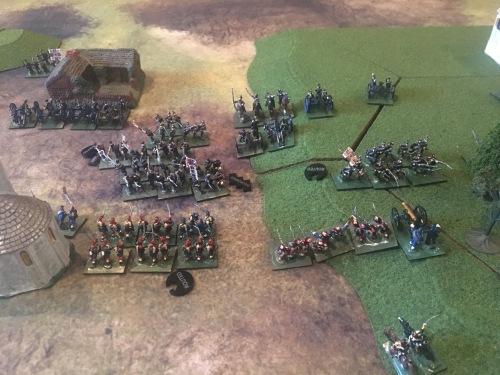
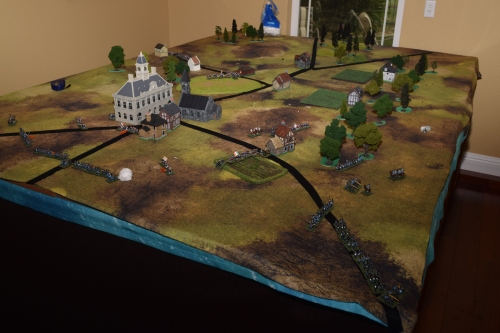
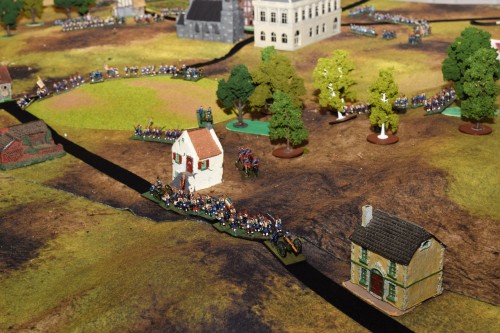
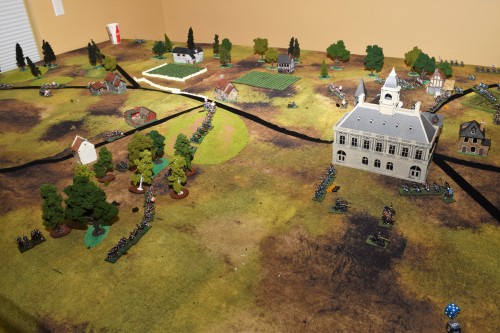
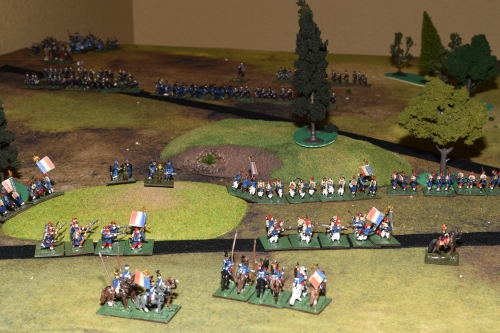
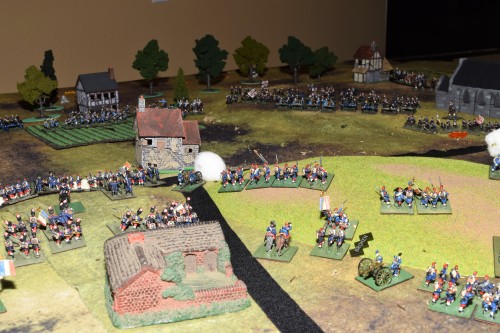
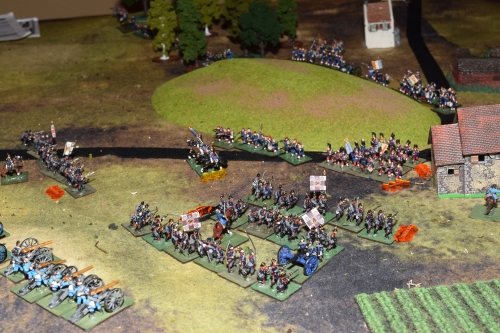
Early morning on day 1 facing south. The French VII Corps is on the field with 3 brigades NW of town and two due north of the town. The corps 6th brigade is deployed in reserve on the large non-cemetery hill south of the town. A division from  the Bavarian I corps is just arriving from the NW road.


DSC_0007

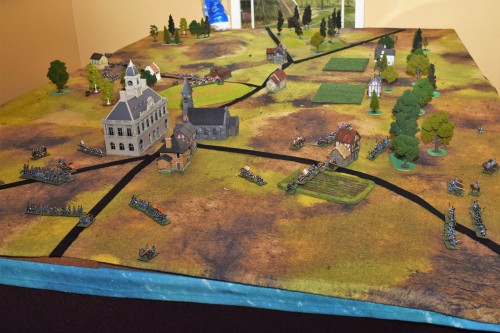
Although reinforcement rolls were biased towards the Prussians the French were the first to receive help. The Vth Corps is just arriving on the field from the east. In the distance is Gettysbourget with the early morning fighting to the NW of tow.


DSC_0014

Prussian, or in this case Bavarian reinforcements arrive! The remainder of the Bavarian I Corps comes on from the northwest while the entire Bavarian II Corps deploys to the north and northeast of town.


DSC_0019

The Bavarian I Corps slowly pushed their way through the trees to their front but were not making much progress. However, the II Corps made short work of the 2 brigades to their front and were poised to move into the town.


DSC_0021

Thankfully for the French their V Corps continued to arrive. One brigade was sent to occupy “Culps Hill” while the rest of the corps moved forward towards non-cemetery hill.


DSC_0022

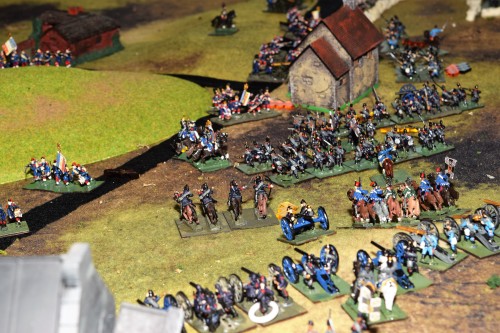
The Bavarian II Corps has completed the destruction of the division to their front and are prepared to move forwards towards “Culp’s” hill.


DSC_0029

Seeing the threat from the Bavarians the French deploy a 2nd division from V Corps while their 3rd division prepares to take up a reserve position.


DSC_0031

The remnants of the 3 French brigades to the NW of town begin falling back under pressure from the Bavarians and the newly arrived Wurttemberg division.


DSC_0033

Desperate to extract as many troops as possible the VII Corps cavalry make a desperate charge into the oncoming Wurttemberg forces. Their losses were horrific but they managed to buy enough time for the infantry to  break contact and make their way back towards the French lines.


DSC_0038

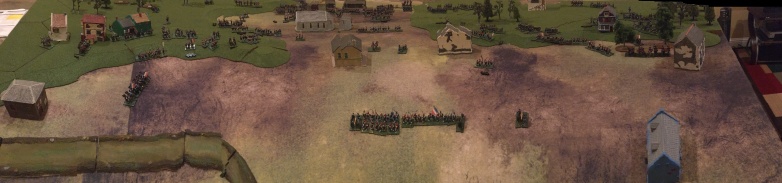
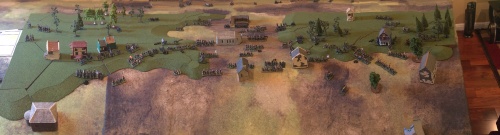
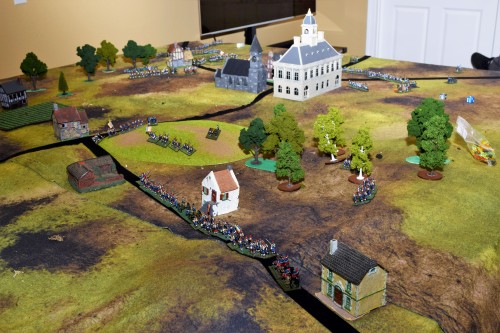
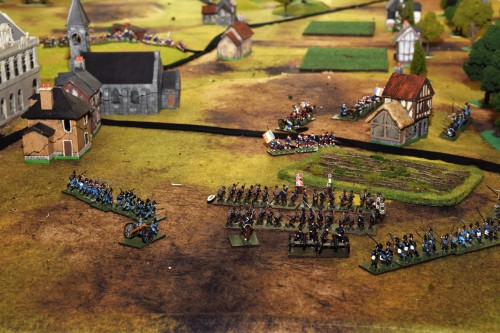
Mid-afternoon overview from the NW looking south. The Prussian V Corps has arrived and is beginning to head south behind the tree line. The Bavarian’s and Wurttemberg divisions press forward towards the French.


DSC_0042

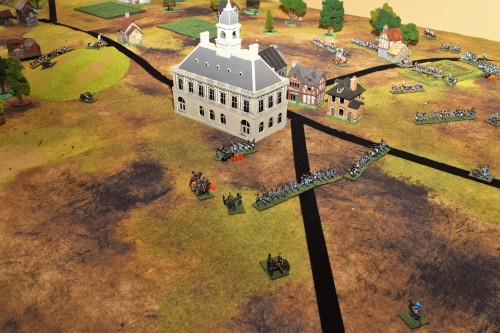
View from the northeast in the mid-afternoon. The Bavarian II Corps begins moving on “Culp’s” while the French V Corps takes up positions on the hills at the edge of the tree line.


DSC_0045

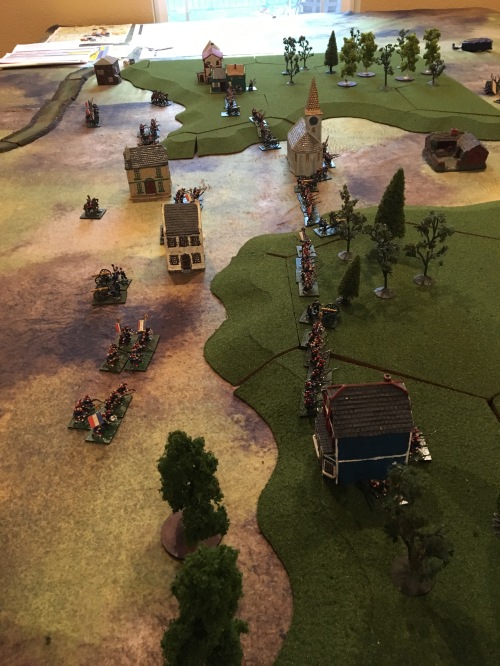
Luckily for the French the elite troops of the I Corps began arriving from the south. Apologies for the unpainted rock walls, they arrived in the mail literally an hour after we started playing and were immediately pressed into service.


DSC_0048 day 2 start

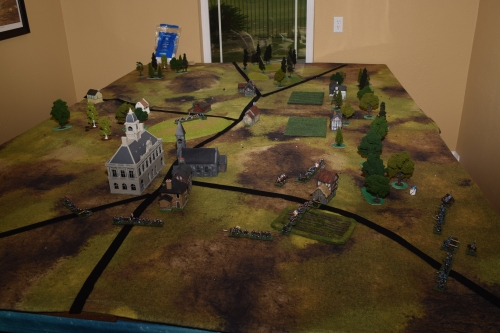
Overview near the end of day 1. The French V & VII Corps have deployed along the hills facing north. The I Corps continues to arrive and will take up position facing west. Meanwhile the divisions of the Imperial Guard begin to take their place in the reserve.

At the end of the first day the French had taken 15,000 combined casualties, dead, wounded and routed while the Prussians had only lost 7,000. A great start for the forces of Germany.


DSC_0055

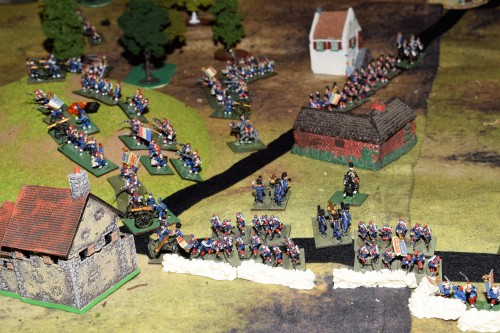
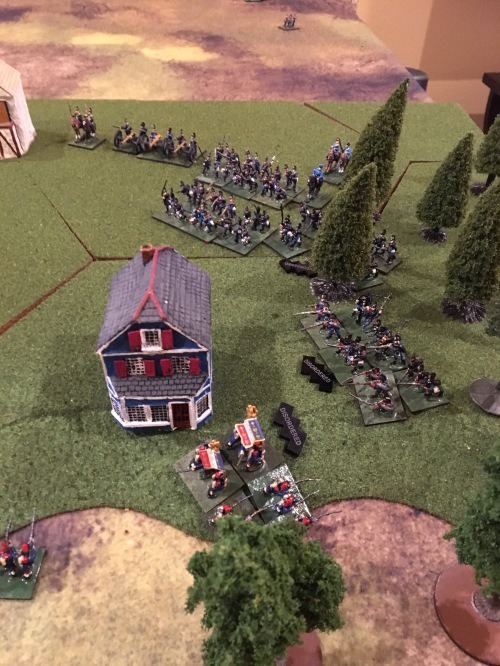
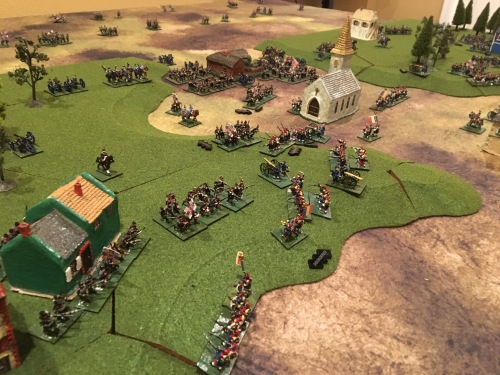
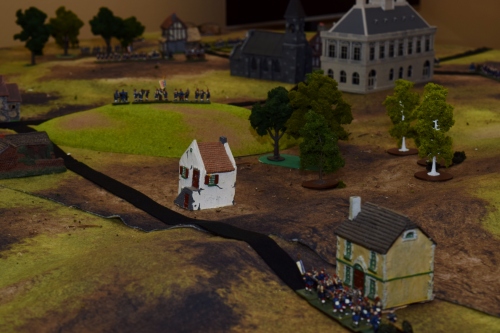
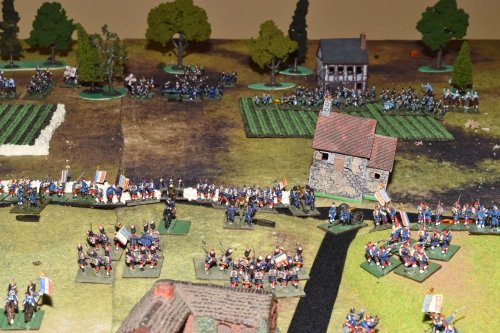
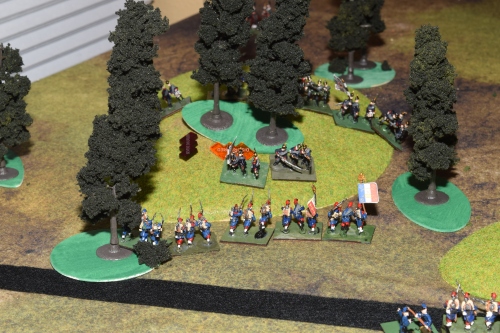
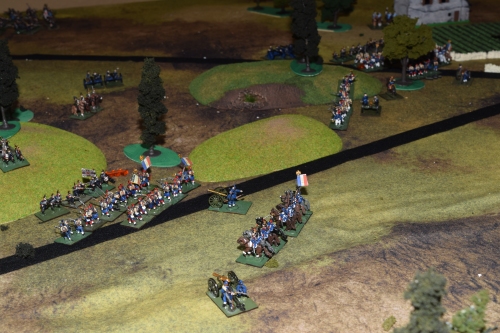
The Guard Voltigeurs deploy behind a stone wall at the “hinge” of the position. Behind the grenadiers can be seen marching up the road.


DSC_0059

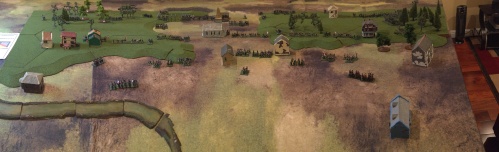
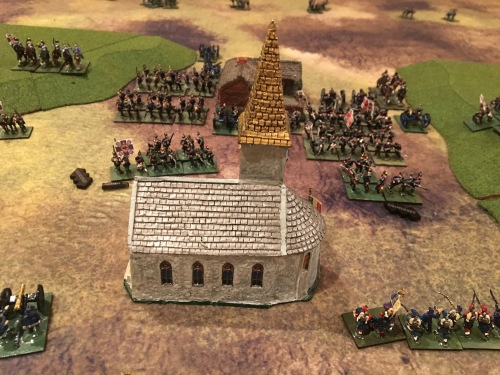
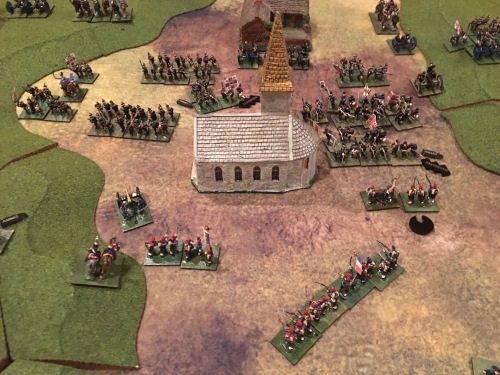
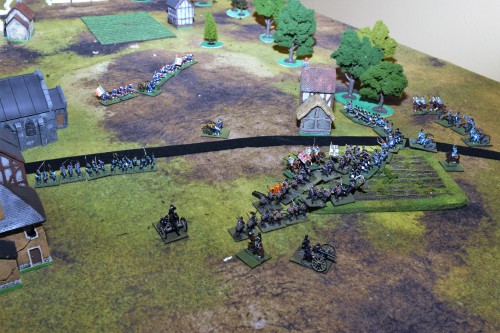
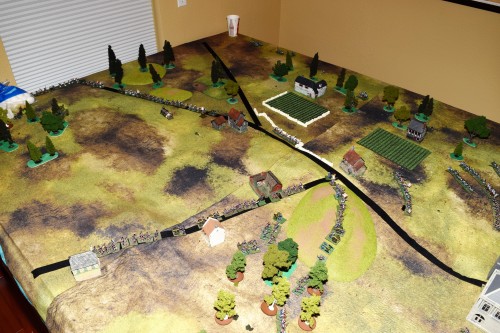
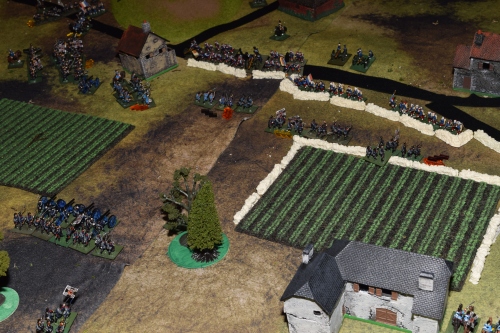
The French positions are nearly complete with a continuous defensive position running from “Culp’s” down to Repaire du diable, or Devil’s Den if you prefer.


DSC_0061

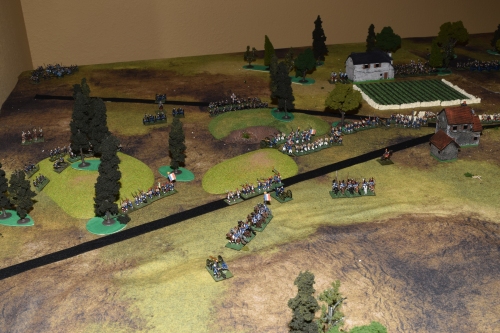
At the French far left infantry arrives at petit sommet and  grande sommet (off camera to the left.) This is the end of the line and if the Prussians break through here, it won’t be pretty. In the distance the newly arrived Prussian XI Corps approaches.


DSC_0062

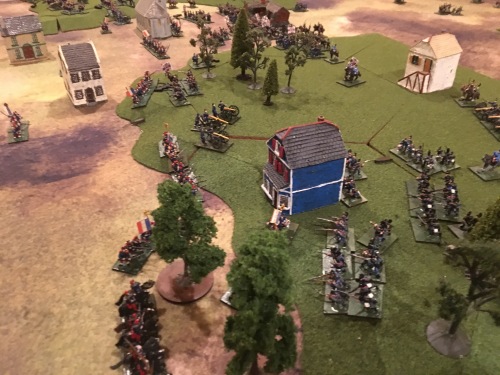
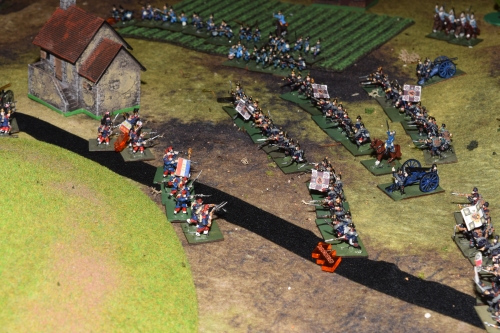
View from behind the French center as the Prussian attacks begin on day 2. Two corps will be sent against this section of line, the Bavarian I and Prussian V.


DSC_0063

To the north the Prussian VI and the Wurttemberg division move up behind a large battery that would eventually grow to over 200 guns.


DSC_0067

The beginning of the southern battle. Prussian artillery has driven the French off of petit sommet while a division begins moving over grande sommet towards a lone French brigade.


DSC_0069

In the northern sector the grand battery, now up to 192 guns begins blowing French units off of non-cemetery hill. For the rest of the battle the French would struggle to keep anyone alive on the slopes of the hill under the deluge of metal from the Prussian guns.


DSC_0073

To the south the French easily repulse the lead Prussian brigade and impetuously begin following the retreating Germans up grande sommet.


DSC_0076

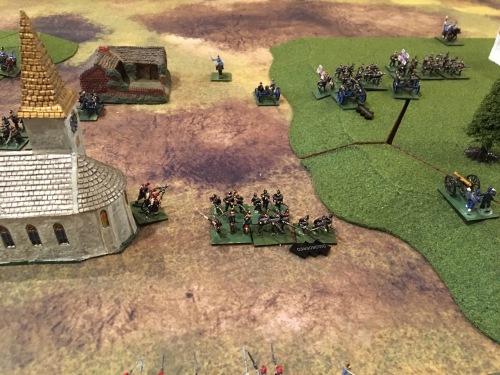
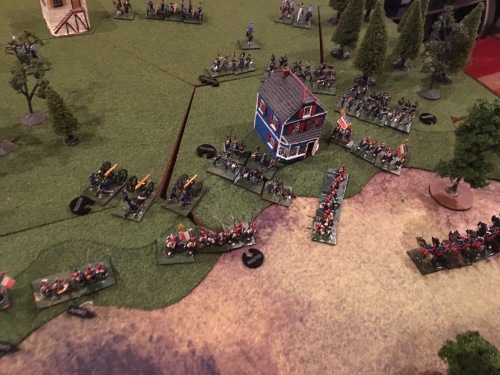
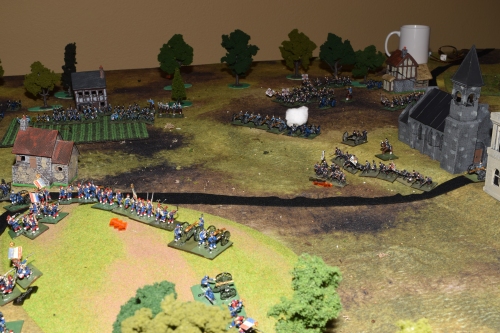
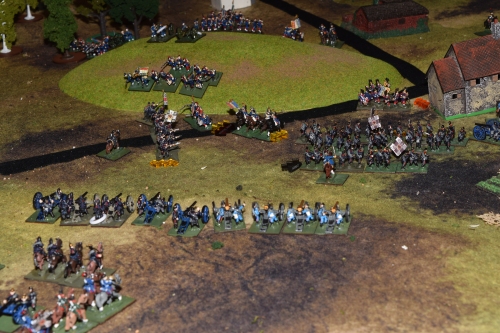
The Prussian “masse de decision” begin driving towards the hinge between the north and east facing sectors of the line. The massive battery has killed many of the VII Corps defenders. All that’s blocking the 3 Prussian divisions are the remaining intact VII Corps brigade and a bloodied brigade of Guard Grenadiers.


DSC_0077

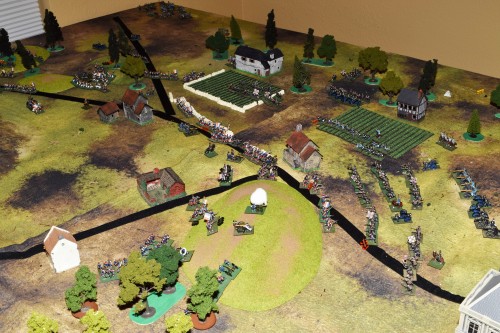
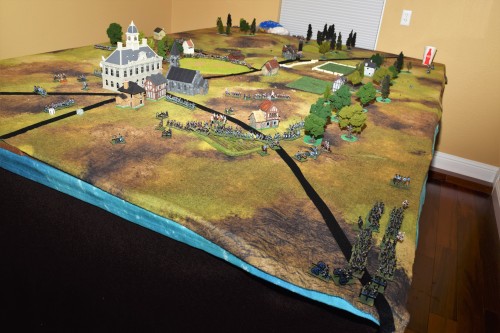
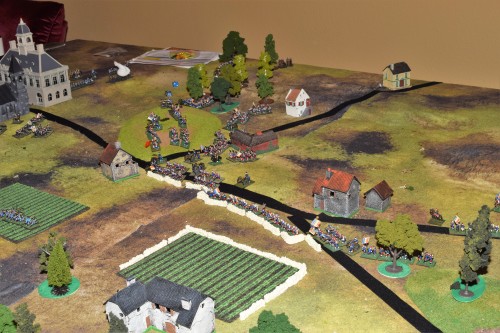
Overview of the battle, early afternoon of the 2nd day. In the foreground the massed Prussian assault goes in towards the hinge. In the middle background the Prussian/Bavarian attacks towards the stone wall have become a bloody mess. To the far south it is still touch and go in the battles for the sommet’s.


DSC_0086

The climax of the battle. A 2nd Grenadier brigade has moved up in support while the Guard cavalry performs a heroic, and seemingly suicidal charge to slow down the Wurttemberg division. Everything hung in the balance as the bloody fight at the hinge continued.


DSC_0091

In the center the Prussians made one last desperate push towards the stone wall. Even with horrific losses they did their best to prevent French reinforcements from turning north to aid in the battle at the hinge.


DSC_0096

The fighting was desperate all along the line as the Prussians in the south made a final push and drove the French back from the grande sommet.


DSC_0093

The French were able to rally units who had been blown off the hill earlier. They charged into battle just as the defenders were on their last legs. The Grenadiers had been decimated, losing an entire brigade, but the remnants valiantly held on. The Prussians were down a brigade and the 3 remaining brigades were disordered but it would only be a matter of time for them to rally and press on.


DSC_0099

Taking advantage of the momentary disorder in the Prussian ranks the Guard cavalry slammed into their flank causing the entire mass to recoil. Shortly thereafter, as the Prussian center fell back from their efforts at the wall, the Voltigeurs would move up to support the remnants of the Guard.

At this point the Prussians began falling back all along the battle front. After recovering stragglers and rallying the routers the French losses totaled 20,000 infantry, 2,000 cavalry and 96 guns. The Prussian losses added up to 28,000 infantry and 24 guns. A victory for the French but at a terrible cost for both armies.


2 Comments

Filed under Franco_Prussian War

Bloody Big Franco Prussian Battle

Played the 2nd battle in a Franco-Prussian campaign that I recently started. The 1st battle wasn’t terrible interesting so I didn’t spend time writing up a post on it. The 2nd however, turned out to be a nail biter and highlighted why campaign battles can be so enjoyable.

In the campaign the Prussians have crossed the border early on July 25th in an attempt to punish the French before they complete mobilization. This means they are fighting the first week without the south German state forces, other than the Saxons who have joined III army already.

The battle began with the French 3rd & 4th corps under Marshal Bazaine in position southeast of Metz. The Prussian 2nd Army under Crown Prince Frederick was in position to attack with the 3rd, 8th, & 10th corps with the Guard corps as potential reinforcements. In Metz, and potentially available (although the chances of French reacting are fairly low) was Napoleon III with the 2nd & Guard corps. These last 2 formations had fought the previous day and repulsed Steinmetz so they already were dinged up a bit.

I had to substitute some Bavarians for the 10th corps and some Baden/Wurttemberg for the Guard although they were rated for what they were supposed to be.

img_0676

Here’s a rough map of the battle at the beginning and a along with a few photos.

beginning-of-battle

img_0689

View from the French left

img_0690

View from the French right


The battle started with the Prussians advancing on a 3 corps frontage. Their initial plan was for the right & center corps to demonstrate and tie up the French while their 10th corps on the left drove in the French right and hopefully rolled up their line.


img_0694

View of the Prussian left as they started their attack

img_0695

Panorama of the battlefield as the fighting commenced


Initially the Prussians met with some success, albeit with higher than desired losses.


img_0696

On the left the Prussians have driven the French from the village

img_0697

And in the left-center they have shoved back the French near the village with the church

img_0698

The Prussian right was mostly stalled at this point with multiple disordered units and not much success in advancing


By mid-morning, as expected, the Prussian Guards arrived drawn by the sound of gunfire. Incredibly, the French also reacted expeditiously and their 2nd corps arrived at the same time (this took some exceptional dice rolling to occur)


img_0700

View from behind the French lines. The 2nd Corps arriving en masse behind the embattled army.

Soon the crisis of the battle arose. The Prussians were driving the French back all along the line. It looked like defeat for legions of Napoleon was soon to follow.


img_0701

The Prussian “masse de decision.” The Guards arrive on the field and prepare to assault the central village.

img_0702

View from the French 2nd Corps. Could the “thin blue line” hold?

img_0703

On the French left the Prussians had advanced and captured the line of villages driving the French before them.


img_0704

While on the French right the Prussians consolidated around the captured village but struggled to advance against the French gun line.


A confused, bloody fight up and down the line resulted. In the midst of the turmoil the French Guard reached the field (a 2nd incredible dice rolling sequence with around a 5% chance of success resulted in their arrival.)


img_0708

On the French right wing they mount a furious assault to try to retake the village.

img_0709

While in the center the Prussian juggernaut appears unstoppable.

img_0710

img_0712

Portions of the 2nd Corps and the Guard allow the French to drive the Prussians back in the center with tremendous losses.

img_0722

Panorama of the battle as the fighting rages

img_0723

One last desperate attempt by the Prussians to drive through in the center.

img_0725

While on the French right things have stabilized. The Prussians will keep the village they’ve paid for in blood but their advance has been stopped cold.


The final Prussian assault failed in the center. At the end, the French held their line and as night fell, the Prussians fell back after suffering horrific casualties. After recouping casualties suffered, in the To The Last Gaiter Button campaign rules that’s easier for the defender than the attacker, the losses looked like this:

French – 16 bases lost out of 85 engaged

Prussians – 25 bases lost out of 100 engaged

After the battle the Prussians retreated to regroup while the French also pulled back into the relative safety of Metz in order to try to regain their strength from the losses over the last two days.

2 Comments

Filed under Franco_Prussian War

French 5th Corps is complete

Just finished the French 5th Corps this week. I’d had to paint the cavalry and artillery along with a few officers. They are, like everything else, painted to a 3′ looking at them on the table standard, i.e. don’t look too close!

IMG_2474

Next up will be the Wurttemberg Division followed by the Baden units. After that it will be the French 7th Corps, Imperial Guard, and one more Prussian Corps. At that point I think we’ll be ready to start our refight of the 1870 campaign.

Leave a comment

Filed under Franco_Prussian War

Frontier Battle

A battle report of an action set early in the Franco-Prussian War. We used Bruce Weigle’s 1870 rules to play out this game. For those who are unfamiliar with these rules they are simultaneous movement with a scale of one battalion per base. The rules themselves are excellent but even if they aren’t your cup of tea the information included with the rules is well worth the purchase and include OOB’s for several periods of the war along with 14 scenarios. They allow fighting fairly large, as you’ll see in this example, engagements from the era.

The opposing forces.

Prussians:

The Prussian army of this period utilized a square organization of 2 divisions per corps, with 2 brigades per division, with 2 regiments per brigade and 3 battalions per regiment. There was a jaeger battalion assigned to each Corps which results in 25 infantry battalions per corps. Each division had 4 batteries assigned and there were 6 batteries in the corps artillery reserve. The Prussian allies were similarly, but not exactly organized with Corps of approximately the same size as a Prussian Corps.

For this battle the Prussians could field their Vth (9th & 10th Divisions) and XI (21st & 22nd Divisions) Corps along with the I & II Royal Bavarian Corps (1st, 2nd, 3rd, & 4th Bavarian Divisions).

French:

The French divisional structure was similar to the Prussian although they had a Chasseur battalion per division which resulted in 26 battalions per division. They also had fewer guns with 2 artillery and a Mitrailleuse  battery per division and either 6 or 8 batteries in the corps reserve. French corps consisted of either 3, if commanded by a general, or 4, if commanded by a Marshal, divisions.

In this engagement the French had the 1st Corps of 4 divisions and half of the 5th Corps with 1 division and a brigade from a 2nd division along with 3 brigades of cavalry from the 1st Corps.

Deployment:

Note on the maps included in this report. They are indicative of approximate positions, of both terrain and troops, and are not meant to be terribly accurate (ok I got lazy and just sketched things in J ). They should allow viewers to follow along what the pictures and the dialogue are reporting.

Below is a map showing the table and the initial deployment. I’m only showing things on a divisional scale so please realize that the individual units are spread out near where the map is showing. Prussians are in Red and identified, for example, as 9D for the 9th Division which is part of Vth Corps or 2B for the 2nd Bavarian division of their Ist Corps.

The French are in blue and shown as 2ID for 2nd Division of Ist Corps.

deployment

The plans:

The Prussians intended to occupy the French left with 1 corps while the 2 Bavarian corps overwhelmed the church area. At that point the remaining Prussian corps and the Bavarian IInd Corps would crush the French center as the Bavarian Ist Corps provided fire support from the church area. They also decided to avoid the wooded area on the German left even though it led around the French flank.

The French plan was to hold their ground and attempt to bloody the Prussians as much as possible.

Below are two photographs of the deployment, the 1st from the Prussian side and the second from the French.

Prussian deployment with the Bavarians closest to the camera

IMG_1331

Birds eye view of the French deployment with the church, the far right of the French army, in the distance.

IMG_1329

The battle:

The battle commenced at 10am with the Prussians bombarding the exposed French 1st Division of 5th Corps on the French left. Meanwhile, the Bavarians moved up towards the French right.

turn 1P

Firing was mostly desultory on the first turn although the French took some casualties on their left. As the battle progressed the Bavarians pushed across the bridge near the church.

Turn 2P

Bavarians pushing across the bridge. Four batteries are deployed near the bridge and are beginning to inflict damage on the French garrisoning the church area. In the background the Bavarian grand battery of 8 batteries can be seen.

IMG_1340

Away on the French left casualties are beginning to mount for the French

IMG_1343

By 11:00 the Bavarians were applying pressure to the Church and had begun to cross the stream to the right of the bridge. Meanwhile the Prussian XIth Corps was moving up from reserve as the Vth Corps artillery continued to pound the French left.

Turn 3P

The Bavarians continue their advance.

IMG_1345

Meanwhile units of the French left beginning to fall back from their exposed position.

IMG_1344

Turn 3F

At 11:30 as the French retreated, the Prussian Vth Corps pushed across the stream to their front.

IMG_1348@1017a52046c64235b1d61f224ed90f52

Turn 4P

The Bavarians continued to pressure the church area but the IInd Bavarian Corps stayed in the woods waiting for the Prussians to move up on their right.

IMG_1349

As the day progressed the Prussians continued to move up on both their left and right.

Turn5P

Turn6P

Bavarian 2nd Division of Ist Corps splashing across the stream.

IMG_1359

While things on the Prussian right were going generally well, they’d shoved the 5th Corps division facing them back off the hill, they had several batteries destroyed in the process. Meanwhile the Bavarian 1st Division was taking casualties on their left and had been unable to budge the French defenders of the church.

Overview of the French right showing the Bavarians advancing against the church but still holding back in the center.

IMG_1363

As the day progressed into the afternoon, it was now 1:30, the Bavarians moved up and began to strongly pressure the church

Turn 7P

IMG_1365

Losses were mounting on both sides but it seemed like the French must ultimately fall back.

In the center of the field the French seeing an opportunity, or perhaps losing their minds, advanced a brigade to try to interrupt the Prussian XIth Corps deployment

IMG_1367

Turn 8F

View of the French “charge” from behind the Prussian lines

IMG_1369

The fighting around the church was degenerating into a blood bath as neither side would give way. Eventually though, the regiment on the far right of the French line, without the benefit of walls for cover, began to fall back.

Turn 9P

IMG_1372

Overview of the battle at this time.

Here’s a helicopter view of the battle from behind the French lines. On the far right the defending regiment has been shoved back. Two regiments of French cavalry have moved into position if it is necessary to sacrifice themselves to help the infantry. The battle for the church appears to be entering the final moments. Losses for the French are mounting although their opponents are also suffering heavy casualties.  In the center the Bavarians have begun moving out of the woods. Theirs is not an easy task as the French have close to dozen batteries that can sweep the field in this area. It’s reminiscent of Pickett’s charge from 7 years earlier. On the French left their reserve infantry and cavalry have begun to move up. The Prussian Vth Corps is reluctant to move forward against superior numbers and with the French brigade in the village on the left which could move against their flank if they do.

IMG_1378

View from behind the Bavarian lines

IMG_1382

At this point, a miracle occurred if you are a Frenchmen, or a disaster if you fought for the Germans. As the far right French regiment fell back the two regiments of French horse, one lancer and one Chasseur a’ Cheval charged the Bavarians toiling up the slope. Because of the hedges blocking their visibility and an almost impossible sequence of die rolls, the cavalry not only survived the rifle fire aimed at them but succeeded in routing the infantry back down the hill where they were pinned against the lake, which was not crossable, and destroyed.

IMG_1395

The losses were so severe that the Bavarian 2nd division was no longer capable of offensive action. At the same time the cumulative losses on the 1st Bavarian division reached the point where they too would no longer advance. The church was saved!

IMG_1397

Turn 11F

Now all eyes turned to the center of the field where the last hope for the Germans lay. Could the 1 Bavarian and 2 Prussian divisions cross the shell swept field and break the French center.

Turn 12P

The answer was no. For all their bravery the rain of shells were too much for even these brave lads too bear.

IMG_1407

At this point the German general signaled for a general withdrawal. He had 3 of 4 Bavarian divisions with such severe losses that they were combat ineffective. For the Prussians, 1 division was wrecked and a 2nd had losses that made future offensive action problematic at best.  The remaining 2 Prussian and 1 Bavarian effective divisions would provide security while the army retired.

For the French which began with 5.5 divisions they had one division, the 1st of the 5th pushed back and suffering more than 25% casualties. The 3rd division of the 1st  Corps had 50% casualties and was incapable of more than holding its ground. The 1st of the 1st Corps had also lost close to 25% of their effectives.

All in all the game was a blast. It felt appropriate for the scale of the game, i.e. we felt like we were commanding armies not squads with a different name.

So how could the French win? The terrain helped  tremendously. In the cases where the Germans could get their artillery clear lanes of fire on French who were not behind walls it was ugly. Unfortunately most of the terrain precluded that kind of fighting. The central woods blocked the least protected French while the rest were either behind stout walls in the church area or in places where they could skulk behind trees. The Germans were forced to try to withstand a hailstorm of Chassepot fire with little to no effective artillery support against a foe who they did not outnumber sufficiently to overwhelm.

3 Comments

Filed under Franco_Prussian War